
Car badges are the emblems or logos that manufacturers affix to vehicles to denote the model, trim level, or brand. While badges serve a decorative purpose, some car owners prefer to remove them for a cleaner or customized look. However, badge removal requires careful technique to avoid damaging the car’s paint or leaving behind adhesive residue. This guide will walk you through the process step-by-step, ensuring you can safely and effectively remove badges from your car.
1. Tools and Materials Needed
To successfully remove badges from your car, gather the following tools and materials:
Tools:
- Heat Gun or Hair Dryer: Used to soften the adhesive behind the badge.
- Fishing Line or Dental Floss: Helps in safely prying off the badge.
- Plastic Pry Tool: Optional but useful for gently lifting the badge.
- Microfiber Cloth: For cleaning and wiping surfaces.
- Adhesive Remover: Helps dissolve and remove leftover adhesive.
- Rubbing Alcohol: Can also be used to clean surfaces.
Safety Equipment:
- Gloves: Protect your hands from heat and chemicals.
- Eye Protection: Prevents any debris from getting into your eyes.
Ensure all tools are in good condition before starting. Now, let’s move on to preparing your car for badge removal.
2. Preparation
Before starting the badge removal process, it’s crucial to prepare your car properly:
Steps to Prepare Your Car:
- Wash the Car: Thoroughly clean the area around the badge with car wash soap and water.
- Dry Completely: Use a microfiber towel to dry the area to prevent water spots.
- Park in a Cool Area: Avoid direct sunlight, which can make the adhesive harder to work with.
Preparing the car ensures that the surface is clean and ready for badge removal, minimizing the risk of damage to the paint.
3. Softening the Adhesive
Softening the adhesive behind the badge is a critical step in the removal process:
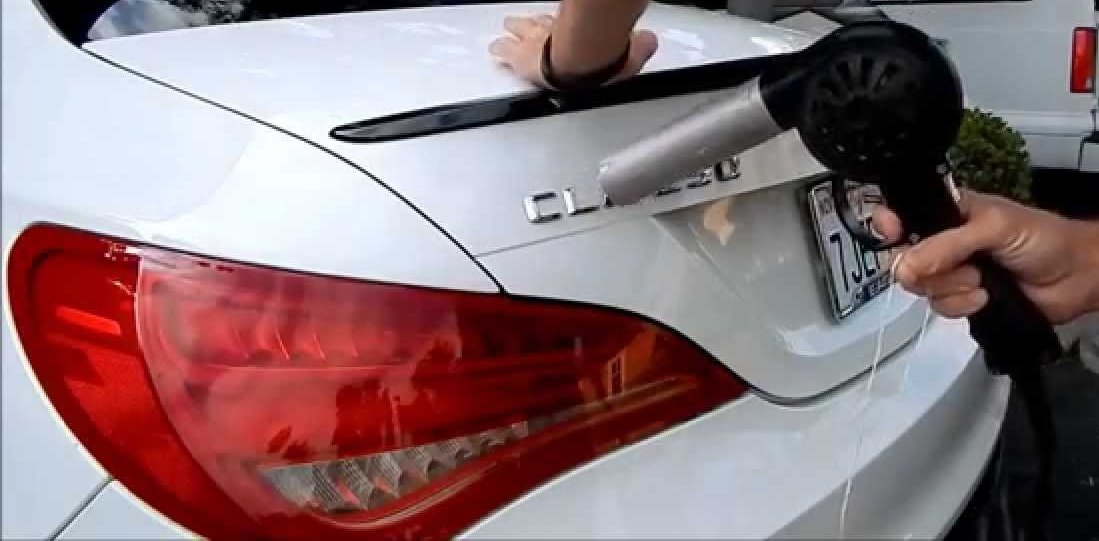
Using a Heat Gun:
Start by setting the heat gun to a low or medium heat setting.
- Heat Application: Hold the heat gun a few inches away from the badge and move it in a circular motion. This heats the adhesive behind the badge, making it easier to remove.
- Avoid Overheating: Be cautious not to overheat the area, as excessive heat can damage the paint.
Alternatives:
If you don’t have a heat gun, a hair dryer set to high heat can also be used. The goal is to soften the adhesive without causing any damage.
Softening the adhesive makes it easier to remove the badge without leaving behind residue or causing paint damage.
4. Removing the Badge
Once the adhesive is sufficiently softened, proceed with removing the badge:
Using Fishing Line:
- Wrap the Line: Gently slide a piece of fishing line or dental floss behind the badge.
- Sawing Motion: Use a sawing motion to work the line behind the badge, cutting through the adhesive.
- Slow and Steady: Work slowly and steadily to avoid applying too much force, which could scratch the paint.
Plastic Pry Tool (Optional):
If necessary, a plastic pry tool can be used to help lift the badge slightly.
- Insert Carefully: Insert the tool between the badge and the car’s surface, gently prying the badge away.
Take your time during this step to ensure the badge is removed cleanly without causing any damage to the paint or surrounding area.
5. Cleaning Up Residue
After removing the badge, there may be leftover adhesive residue on the car’s surface:
Using Adhesive Remover:
- Apply Remover: Apply a small amount of adhesive remover to a clean microfiber cloth.
- Gentle Rubbing: Gently rub the cloth over the adhesive residue in circular motions.
- Repeat as Needed: Depending on the adhesive strength, you may need to repeat this process multiple times.
Rubbing Alcohol:
- Apply Alcohol: Alternatively, apply rubbing alcohol to a cloth and gently rub over the residue.
- Wipe Clean: Wipe the area clean with a fresh microfiber cloth to remove any remaining residue.
Cleaning up adhesive residue ensures a smooth and clean surface after badge removal, preparing it for the next steps.
6. Polishing and Protecting
Once the adhesive residue is removed, it’s essential to polish and protect the area where the badge was located:
Polishing the Area:
- Apply Polish: Use a car polish specifically designed for your vehicle’s paint color.
- Buffing Motion: Apply the polish in a circular motion using a clean microfiber cloth.
- Restore Shine: Buff the area until the paint’s shine is restored.
Applying Wax or Sealant:
- Protect the Surface: After polishing, apply a layer of wax or sealant to protect the exposed paint.
- Follow Instructions: Follow the manufacturer’s instructions for proper application and drying times.
Polishing and applying wax or sealant helps blend the area where the badge was removed with the rest of the car’s surface, ensuring a seamless finish.
7. Finishing Touches
Before concluding the badge removal process, take a few final steps to ensure everything looks professional:
Inspecting for Imperfections:
- Check Carefully: Inspect the area from different angles to detect any missed adhesive or imperfections.
- Touch-Up if Necessary: If needed, touch up the area with a small amount of polish or wax.
Professional Look:
- Smooth Transition: Ensure the transition from badge to bare surface looks smooth and seamless.
- Detailing: Consider detailing the surrounding area to enhance the overall appearance.
Taking these final steps ensures that your badge removal project results in a clean and professional look for your car.
Conclusion:
Removing badges from your car can be a rewarding DIY project, but it requires careful planning and execution to avoid damaging your vehicle’s paint. By following the steps outlined in this guide, you can safely remove badges and achieve a cleaner, customized look for your car.